Varalakshmi Pooja 2020

This year it is a different experience of Varamahalakshmi Vratham.

Unlike every year it was a quiet one without any friends or family (thanks to COVID craziness and social distancing) . However, we had a great pooja and my favorite of all ❤ This year I had an additional ammavaru, my husband’s aunt gifted me a new amma’s set (body) with a kalash on top to add coconut and face(roopu). But I already have a roopu that my MIL gave for my wedding and wanted to continue using it. It took a while for me to figure out setting up both the idols and this is how my ammavaru looks ❤

This year setup is simple, elegant and my ammavaru and decorations have come together well.

I used some diya decals ( from Amazon India) and used the orange and red tissue paper garland ( tutorialon my blog) . And for some color pop I used little wood blocks as diya stands( tutorial coming soon) and flowers are a wonderful addition for the whole set up to look divine.

So, here is goddess body with a hole ( kalash) to place coconut. So since the silver face I have is small I have bought a new face(easily available in every temple store).

Well, the real challenge was to place the face to the body without adding coconut. then, i used a foam cone to fill the space and tied the face to it. Then added some wool hair (braided) as jada!

To raise the height used some books and covered with my daughter’s silk skirt (repurposed) in 2 layers and placed the idol on it.

And I always use some jewelry wire to make garlands and they are always a hit. They stay well and easy to decorate.

So, these are some tips in setting up ammavaru for varalkshmi vratham/pooja, hope you find it useful and have a wonderful pooja this year.

Please note – This information/tips is for personal use only, not for selling or replication and reposting on digital media (Youtube/Instagram).

Breakfast/snack Plates – 4

Well, I am enjoying making these fun plates for my toddler and have completed 75 now.. Yay…..

Yes, I have shared 40 of them in my previous posts and today here are some more plates.

Most of the plates are inspired from our everyday life, my toddlers books/toys and all the thing she loves <3. Hope you enjoy viewing them and also if you love to do food art make some for your toddlers/kids on something they love.

Sloth slogan 😁

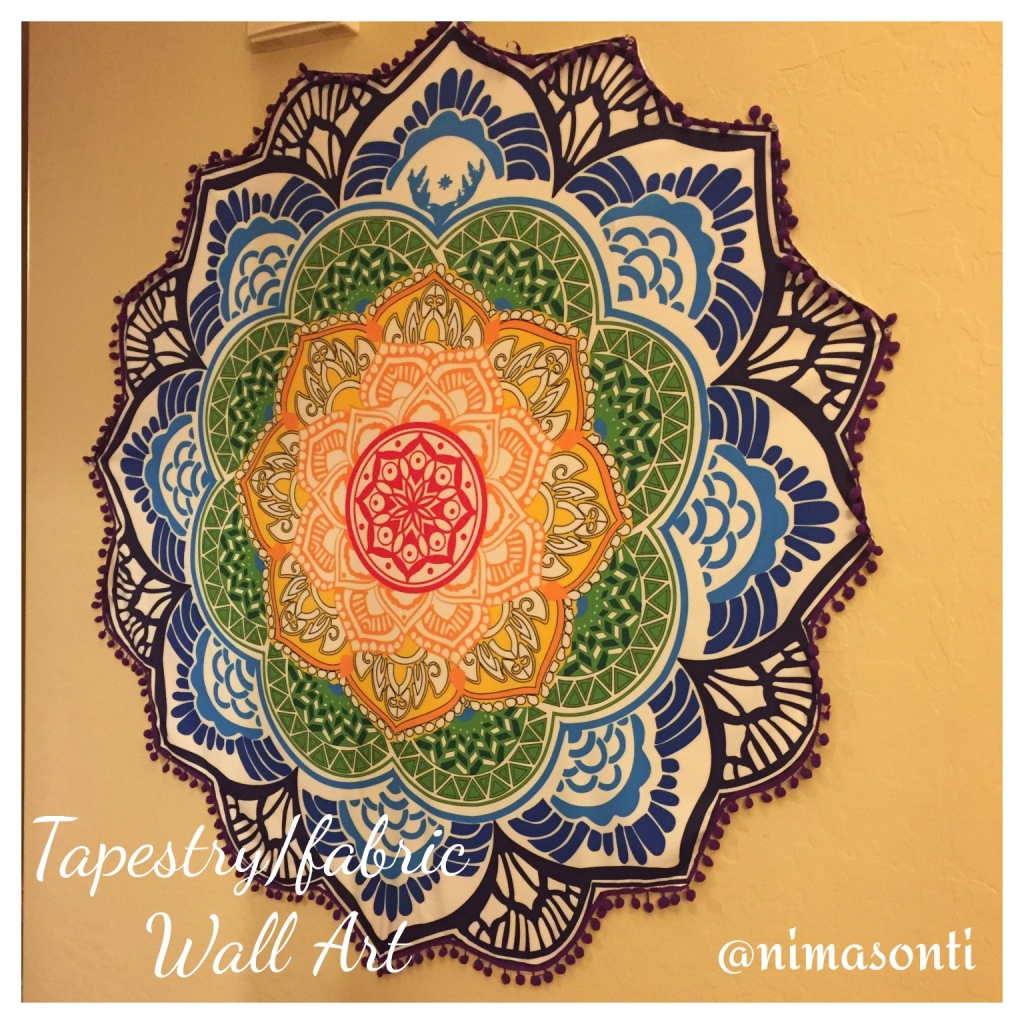
DIY Fabric wall art !

If you have a huge empty wall waiting for a makeover here is a easy, quick and a fun project.

Statement peice of wall arts are a great way to decor until you figure out the right design.

Sometimes it takes weeks or months to come up with a perfect thing that matches your style and rest of the house theme. Until then, if you don’t mind a burst of colors then here is one such project using fabric.

Now available on Amazon

This is from our previous home in Phoenix, AZ, which was a ranch home with 12ft ceilings. The first idea was to collect couple of art pieces and family photos and put it all together but it was taking longer than I expected and my husband is not a big fan of busy walls!

So, I left it for a while but wasn’t happy with an empty wall.

Then one day, when I was browsing eBay back in 2016, I found this yoga/picnic mat with mandala theme for $8 ! I was so excited and ordered it right away. I guess it is shipped from China , it took forever and I gave it up!

After almost 2 months it arrived and I was super excited! It came in a small package (prob 4×6) so the mat was in multiple folds and had creases all over.

I patiently ironed it multiple times ( with a cotton fabric on top) and I was surprised how pretty the colors were and the fabric too. Then used a bunch of pushpins and that’s it !!

Tadah….

I was super happy with the results and whoever visits our home that was the first piece of conversation.

Candle holder Makeover

Right now I am in makeover mania 🙂

Last month it was patio metal wall arts from garage sale and dollar store and this week almost 6 year old candle holders again from dollar tree.

I love dot mandala and I am not good at painting, so thought why not use that technique on these textured candle holders and I absolutely love the way they turned out !

Like I said, I have had these for quite some time and I have been using them to display on my entry way table. I wanted to add some Indian colors to match the theme for the upcoming Indian festivals.

Washed and wiped them down and used some bright acrylic colors. Here is a video of WIP.

And used a knitting needle and some contrast color for the smaller dots. Before you use a contrast color let the base color dry thoroughly.

And Tadah…the are ready to use. I am so excited how bright and colorful they turned out.

Hope you find something in your home that needs a little color and makover and don’t hesitate to take risk and try it out. I am sure it will turn out to be wonderful and better than before.

Do you like the little yellow and orange marigolds? Oh, they are my favorite too and click here for the tutorial 🙂

And how about those pretty and colorful paper lotus on the wall – click here

Breakfast/Snack plates – 3

40 and counting….

Today I completed my 40th breakfast/snack plate and each idea has a story. My toddler is the reason for these creations. She is not a picky eater – she loves veggies and fruits and these plates make it more interesting and our conversation during breakfast/snack time are more productive and fun too.

So, even though your toddler/kid is a good eater these plates are fun to create and serve them.

For more – follow me here.

Mama and baby crab enjoying clean and empty beach ♥️
Dosa monkeying around
A happy little girl shining bright
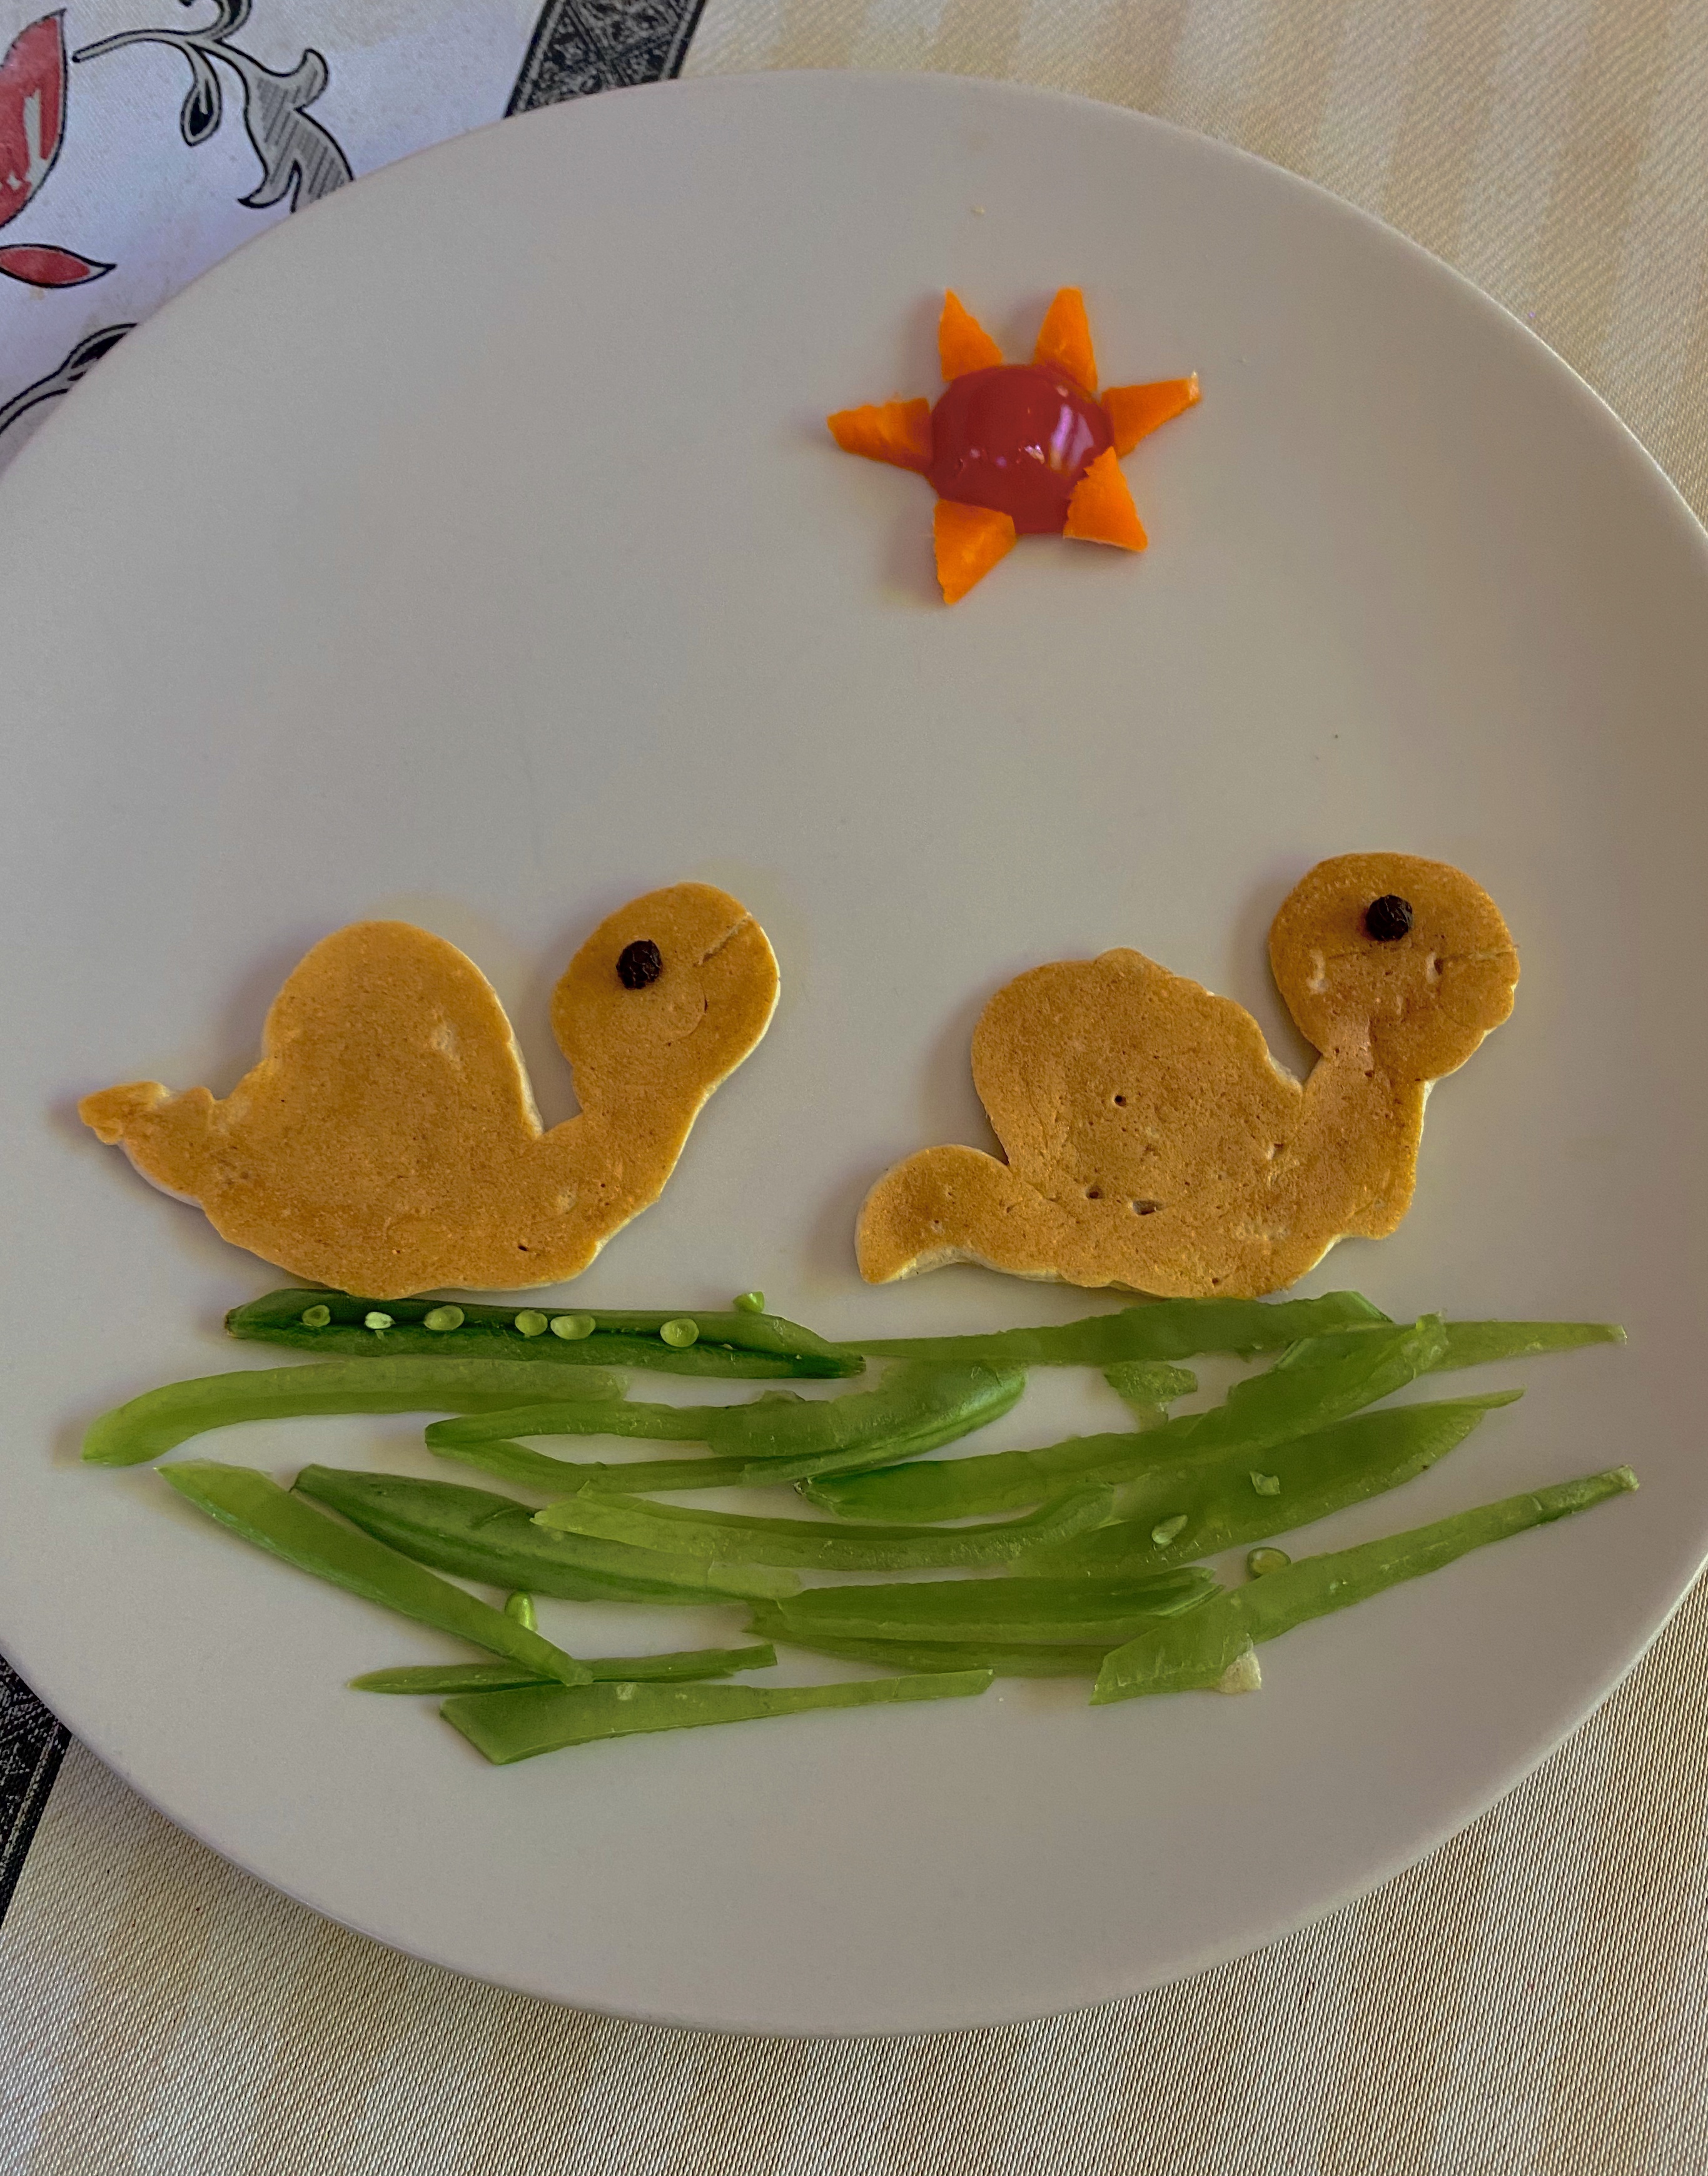
Herbivore Dinosaur
Omelette piglet
Dragon ready to take off
Brown & Bumpy Bear
Idli art ♥️
A very hungry caterpillar
Cranes in marshy we lands

Hope you’ll enjoy these – see you all in my next post!

Easy baby/toddler popsicles

Who doesn’t love popsicles?

And with summer approaching and warmer weather we all crave for some delicious cold ice-cream/popsicles.

Sisira doesn’t have sweet tooth so it was easy for me to keep her away from all the sugary stuff available in the market. But toddlers as they grow they see, read and learn new things and her new favorite is popsicles.

I don’t want her to feed on the store bought ones which usually have lot of corn syrup/processed sugar and food dyes. This doesn’t mean she can never have them…;-)

Then, why not let her enjoy and also get some nourishment too.

So I have been working on making some healthy popsicles from fruits and veggies purees and they are turning out delicious and creamy ( with no ice pellets).

Here is the recipe of 2 of our favorites so far  and the combinations are endless.

Berries and cucumber.

Cucumber – 1/2

Berries – 1 cup ( any mix)

Honey – 2 tsp

Milk (whole /coconut) – 1 cup (I used coconut milk)

Honey Mango

Mango – 1( pitted)

Milk – 1 cup( I used whole milk)

Honey – 2 tsp

Nuts/spices – optional ( we like the plain mango flavor)

First blend the coconut/whole milk for couple of minutes until frothy. Then add the veggies or fruit and blend it all together for another 2 minutes. The mixture gets thick and creamy. Pour into molds and freeze atleast for 6 hours.

You can adjust the sweet levels as per you taste.

These popsicles are light and not very sweet and oh, full of flavor.

Try these with your baby/toddler’s favorite fruits and veggies and for lactose intolerance/vegan you can use almond milk too.

Fun Breakfast plates – II

Well, it’s been a month that I started plating my toddler breakfast and snack with some themes. Mostly, her favorites.. Some of them are inspired from images from her books and some from doodles found on internet. I have been enjoying this new form of art and my new hobby and completed 25 plates….

Yes, 25 I have never thought I will be able to do something with food and create a colorful and too pretty to eat plates and my toddler is more than excited everyday (she is now sensing) and sometimes when we do it together she will ask for a character or color 🙂

Like I said in my previous post I use fruits, veggies, pancake and dosa batter. In my last post I have shared some of them, here are some more –

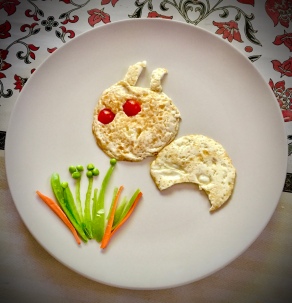
Fried egg art

Pancake and dosa art

Fruits & Vegetables

For more food art/breakfast plates follow me on Instagram – nimasonti 

Fun breakfast art plates

Lately, I have been enjoying creating some fun breakfast plates for Sisira.  Nothing fancy,  some cute designs from the breakfast/snack I serve her for the day.

My little girl is my inspiration, and also things around me such as her toys and books.

Sharing some of them with you all. Something fun during these times when kids are bored of regular breakfast.  Also, these cute designs help children to eat their fruits and veggies and they will love them.

Here are some designs and for more follow me @ Instagram

Ocean Theme 

img_2802

Number lollipops

img_2741

Nutty Garden flowers 

img_2687

Farmhouse theme

img_2906

Pancake Art 

img_3095

Solar System 

img_2840

Hope you enjoy these and create fun breakfast plates for your little ones.


Beerakaya\Ridge Gourd Mint Chutney

Beerakaya/Ridge gourd is a popular and abundantly available vegetable and used mostly by south Indians. It is a very nutritious vegetable and is used in multiple ways.

We usually make dal, curry and pachadi/chutney from it. Usually, in almost all the households in Andhra the peels of beerakaya are saved after making curry and a delicious chutney is made using some spices and it tastes wonderful.

img_2748

And adding mint/pudina to this takes it to another level. This is my mom’s signature dish and my favorite too, and whenever I visit home I make sure she does it at least couple of times..:-)

It pairs well with hot steamed rice and ghee. It can also be used as a side dish for dosa/uttapam. This is a simple chutney with basic ingredidents and each region has a different version of it.

Lets get started with the recipe and next time when you buy Ridge gourd do not forget to grab a bunch of mint/pudina.

Ingredients – 

Ridge gourd peels – 2 cups

Mint (chopped) – 1 cup

Tamrind (soaked) – a small lemon size

Oil – 3 tsp

Channa dal – 2 tsp

Urad dal – 1 tsp

Coriander seeds – 1 tsp

Jeera – 1/2 tsp

Hing – as per taste

Curry leaf – 2 sprigs

Green/red chilli – 3

Salt – as per taste

How you make the chutney

To begin to make this chutney chop the ridge gourd peels into small pieces, also you can add a piece of ridge gourd for additional flavor. Also, rinse the mint througly and chop them and keep aside.

Heat oil in a heavy-bottomed pan and add oil, when hot add channa dal, urad dal. when they start to turn brown add coriander seeds and jeera. Once everything is fried well, add hing, chillies and curry leaf and let it cook for a minute.

Now add ridge gourd peels and mix everything well. Cover it and let it cook for 3-5 minutes. Then in the center of the pan add chopped mint and cover and let it cook for 8-10 mins until it starts to loose all the water and turn soft.

Then add salt, turmeric and soaked tamrind and let it cook for another 3-5  mins. When it is completely cooked the mixture starts changing color keep it aside and let it cool before grinding.

While the mixture is cooling, lets make tempering in the same or separate pan. Add a tsp of oil and when hot add jeera, mustard seeds and hing. Grind the chutney and top it with tempering.

And you have a delicious chutney ready to be served with  hot rice and ghee. Or can be a side dish for uttapam/dosa.

img_2749

Beet Greens & Mung Bean Dal

Finally, it feels like spring and we are enjoying the lockdown period with more outdoor time in the patio and evening walks. Not that it is not cold, but at least sunny and dry (no grey skies). During the day when it is sunny I would love to spend time with my toddler in our back yard and thankfully instant pot makes cooking lunch effortless and zero monitoring.

Well, today I am going to share a delicious dal recipe cooked in the Instant pot.

Who doesn’t love dal, the comforting food of all. All these years I have been making stove top version but in IP it comes out together rather quickly. It tastes great with rice or can be served with roti.

img_2542

This dal is different from regular ones and the lentil used is Mung Bean. Dal can be made with different types of dry lentils and usually paired with some tomatoes and greens. However, mung bean is our family favorite and can easily become staple in your home too. It doesn’t need soaking and tastes great paired with beet greens.

So, next time, don’t throw away the nutritious greens that top the beets ( both red and yellow). They can be easily replaced with methi or spinach or kale and can be cooked with any kind of lentils.

When using beet greens wash thoroughly and trim the thick stems. Fold/lay it flat and cut the thicker veins of the leaf and chop them finely.

img_2491

So let’s get to the recipe and see what you need :

Mung beans – 1/2 cup

Beet Greens – 1 cup

Tomato  – 1

Oil/ghee – 2 tbs

Onions (Chopped) – 1/4 cup

Green chillies  – 2

Cilantro – 12 sprigs

Ginger garlic paste – 1 tsp

Turmeric/Garam masala/Chilli powder – 1 tsp

Salt – per taste

Water – 2.5 cups

Method

Wash and rinse the mung bean. Set aside. Turn on the Instant pot on saute mode. Add oil and once hot add tadka and when done, add hing, chopped chillies and ginger garlic paste, saute for a min.

Add chopped onions and saute until they turn translucent.

Then, add chopped beet greens and tomato and mix it. Add the spices and let it cook for 3-4 minutes. Add the rinsed mung beans.

Add water, salt and chopped cilantro and mix thoroughly. Cancel  saute mode and close the lid. Select pressure cook (normal) for 12 minutes and let the pressure release naturally.

Once the pin drops, open and mix it well. At this point adjust the salt/spice levels. I added less spices because it is my toddlers fav too and also we like it soupy. So, if you think the water is more turn on saute and let it cook for couple of mins or reduce the water to 2-21/4 cups.

Top it with some fresh cilantro and serve with hot rice or rotis.

img_2586

Hope you love it and enjoy all the goodness and flavors of this wonderful dal.

Also, a great way to use different type of lentils for dal during these times.

See you all soon in my next post!!

Cooking Without Limits

Food Photography & Recipes

Travelling Krishnaite

Shekhar Srivastava's Blog

Live-😊-Life..

"It has everything in little as a HAPPY package!!"

DesiCrafts

A blog Dedicated to Indian handicrafts, Fabrics and Supplies

Fulgorine

My adventures with art and polymer clay

The Beaded Bazaar

Polymer clay creations

Learn Polymer Clay

Inspiring you to explore your creativity and get down to work! A great collection of Free Polymer Clay tutorials

Wear the Ducky Tie

A Sewing Blog

sewmanju

Make your own style

SEW KATIE DID

because thread is the best glue.

The Crafty Coup

Finally, you're here! Let's make something!

The Daily Post

The Art and Craft of Blogging

WordPress.com News

The latest news on WordPress.com and the WordPress community.